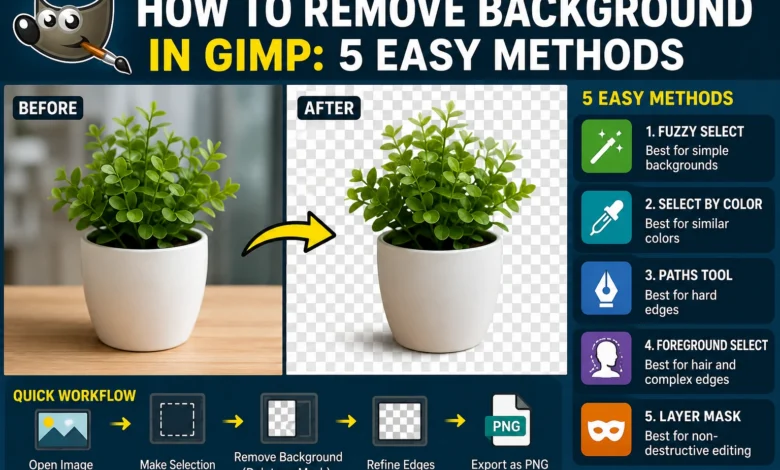
Learning how to remove background in GIMP starts with choosing the right selection method for your image. A plain white background needs a different process from a busy outdoor scene. A product with hard edges is also easier to cut out than hair, fur or transparent fabric. GIMP includes several selection and transparency tools for these different situations. You can delete the background directly or hide it with a layer mask. This guide explains both approaches and shows how to export a clean transparent image.
Choose the right background removal method
Do not choose a tool based on speed alone. Look at the subject’s edges, the number of background colors and the amount of contrast in the image. Readers who prefer faster online tools can also read our guide on using a free image background remover for professional results. Fuzzy Select works well when the background is one connected area with a similar color. Select by Color is better when the same background color appears in several disconnected areas. Paths are accurate for products, vehicles, furniture and other subjects with defined edges. Foreground Select or a layer mask is usually better for people, pets, hair and uneven outlines.
| Image type | Recommended GIMP method |
| White logo or simple graphic | Color to Alpha |
| Plain connected background | Fuzzy Select |
| Same color in several areas | Select by Color |
| Product with smooth hard edges | Paths |
| Person, pet, hair or fur | Foreground Select or layer mask |
GIMP’s official documentation lists Free Select, Scissors Select and Foreground Select as options for separating a subject from its background. The best option depends on the complexity of the subject and how clearly it differs from its surroundings.
Prepare the image for transparency
Open the image by selecting File, then Open. Before making a large edit, duplicate the original layer from the Layers panel. This gives you a backup inside the same project. Next, right-click the working layer and select Add Alpha Channel. The alpha channel stores transparency information, so deleted pixels can become transparent instead of turning into a solid color. how to remove background in GIMP also provides the command under Layer, Transparency, Add Alpha Channel.
The Add Alpha Channel option may appear disabled. That usually means the selected layer already has one. A gray checkerboard will appear after background pixels become transparent. The checkerboard is part of the how to remove background in GIMP interface and will not appear in the exported file. Make sure you are editing the correct image layer instead of a layer group, mask or hidden layer. Save the working project as an XCF file before making detailed changes.
Remove a white background with Color to Alpha
Color to Alpha is usually the fastest method for a white logo, scanned drawing, icon or product photo with a nearly uniform background. It converts the selected color into transparency while keeping partially blended edge pixels. This often produces smoother results than selecting the white area and pressing Delete. However, the chosen color may also become transparent inside the subject. A white shirt, white lettering or bright reflection may therefore lose opacity. Inspect the full image before accepting the result.
Steps for using Color to Alpha
- Select the correct image layer in the Layers panel.
- Add an alpha channel if the layer does not already have one.
- Open Colors, then choose Color to Alpha.
- Click the color swatch in the dialog.
- Choose white or sample the actual background color.
- Review the preview at full size and close zoom.
- Click OK when the subject remains clear.
The official how to remove background in GIMP documentation states that Color to Alpha makes the selected color transparent while trying to preserve antialiased edge information. It can be opened from Colors, Color to Alpha or from the Layer, Transparency submenu.
Remove a plain background with Fuzzy Select
Fuzzy Select, often called the Magic Wand, selects connected pixels that are similar to the point you click. It works well for a person photographed against one plain wall or a product placed on a simple backdrop. It does not automatically select matching colors separated by the subject. You may need to hold Shift and click several background sections. The Threshold setting controls how much color variation the tool accepts. A low threshold creates a narrow selection, while a high threshold may cut into the subject.
Steps for using Fuzzy Select
- Add an alpha channel to the working layer.
- Activate Fuzzy Select from the selection tools.
- Enable Antialiasing for smoother boundaries.
- Turn on Draw Mask when you need a clearer selection preview.
- Click the background and adjust Threshold in Tool Options.
- Hold Shift while clicking additional background areas.
- Press Delete after the background is selected.
- Use Select, None to remove the selection outline.
Zoom to at least 200 percent and inspect the boundary after deletion. Undo the step if parts of the subject are missing. Lower the threshold and repeat the selection in smaller sections. Add a temporary layer under the subject and fill it with a strong contrasting color. This makes missed pixels and white edges easier to see. Remove the temporary layer after finishing the cleanup.
Remove repeated colors with Select by Color
Select by Color works across the entire layer instead of selecting one connected region. It is useful when a background color appears between a person’s arms, around product handles or inside separate gaps. Clicking one blue area can select similar blue pixels throughout the image. This can save time on illustrations, icons and studio photos. The method becomes less reliable when the subject contains the same color as the background. Adjust the threshold slowly and inspect the subject before deleting anything.
Steps for using Select by Color
- Select the image layer and confirm that it has an alpha channel.
- Open Select, then choose By Color, or press Shift+O.
- Click a representative area of the background.
- Adjust the Threshold setting until most of the background is selected.
- Hold Shift and click any remaining background shades when needed.
- Use Select, Grow by one pixel if a thin fringe remains outside the selection.
- Apply a small feather only when the edge looks unnaturally sharp.
- Press Delete and clear the selection.
GIMP provides Select, By Color as an alternate way to open the Select by Color tool. The documented keyboard shortcut is Shift+O.
Create clean product cutouts with the Paths tool
The Paths tool gives you direct control over the outline and is often the best choice for product photography. It works well for boxes, electronics, bottles, tables, cars and other objects with defined edges. You create anchor points around the subject and curve the lines where needed. Fewer well-positioned points usually produce smoother curves than many closely packed points. This process takes longer than color-based selection, but it gives more predictable results. Avoid using it for loose hair or fur because a hard path cannot follow every strand naturally.
Steps for using Paths
- Select Tools, Paths or press the B shortcut.
- Click to place anchor points around the subject.
- Click and drag while placing a point to create a curved segment.
- Place points on changes in direction instead of adding them at equal distances.
- Close the path by connecting the final point to the first point.
- Choose Selection from Path in the Tool Options or Paths panel.
- Add a small feather when the photograph needs a softer edge.
- Open Select, Invert to select the background.
- Press Delete or add a layer mask from the selection.
GIMP uses editable Bezier curves for paths. The finished path can be converted into a selection through the Selection from Path command.
Remove a detailed background with Foreground Select
Foreground Select is useful when the subject has uneven edges that would take too long to trace manually. Good examples include a person with loose hair, your cat’s fur or clothing with folds. Begin by drawing a rough boundary around the subject. You do not need to follow every edge during this first stage. how to remove background in GIMP then asks you to paint over representative parts of the foreground. The tool uses those marked areas to estimate which pixels belong to the subject.
Steps for using Foreground Select
- Add an alpha channel to the image layer.
- Choose Foreground Select from the toolbox.
- Draw a loose outline around the subject.
- Press Enter to move to the marking stage.
- Brush across several colors and areas inside the subject.
- Avoid painting over the background.
- Preview the mask and add more foreground marks where needed.
- Press Enter to create the final selection.
- Invert the selection and remove the background.
The official GIMP instructions describe Foreground Select as a process that starts with a rough outline and then uses painted foreground marks to refine the selection.
Use a layer mask for safer editing
A layer mask hides pixels without permanently deleting them. This is the preferred workflow when the image contains hair, soft shadows or edges that may need later correction. Black areas on the mask hide the layer, while white areas reveal it. Gray creates partial transparency, which helps preserve soft transitions. You can switch between black and white while painting to remove or restore parts of the subject. The original layer pixels remain available until you apply the mask.
Steps for adding a layer mask
- Create a selection around the subject with any suitable selection tool.
- Keep the subject selected instead of the background.
- Right-click the layer and choose Add Layer Masks.
- Choose Selection as the starting source.
- Enable Invert Mask when the preview hides the wrong area.
- Click Add and select the mask thumbnail.
- Paint with black to hide unwanted pixels.
- Paint with white to restore missing parts.
- Use a soft brush around hair and shadows.
GIMP layer masks can control fully opaque, partly transparent and fully transparent areas. A white mask begins with the full layer visible, while a black mask begins with the layer hidden.
Clean rough edges and white outlines
A successful cutout often needs a final edge pass. Place one white layer and one dark layer below the subject, then switch between them during inspection. A light fringe may disappear against white but become obvious against black. Use a small soft brush on the layer mask to correct isolated pixels. Avoid heavy feathering because it can create a blurry border around the full subject. For a narrow white halo, shrink the selection by one pixel before creating the mask, or carefully paint inward along the mask.
Hair needs a softer process than product edges. Do not erase individual strands with a hard brush. Start with Foreground Select, then refine the result on a mask at high zoom. Preserve partially transparent pixels around fine strands because they help the subject blend into a new background. Test the cutout against the actual background that will be used in the final design. A cutout that looks correct on the checkerboard may still need color or edge adjustments.
Replace the removed background
Create a new layer after the old background has been hidden or deleted. Move the new layer below the subject in the Layers panel. Fill it with a color, gradient or another photograph. Check whether the direction of light matches the subject. A bright studio subject may look unnatural on a dark outdoor scene without added shadows or color correction. Save the layered XCF file so you can replace the background again without repeating the cutout.
After creating a transparent image, you can use it in social media designs by following our guide on how to create a pink PFP for Instagram and TikTok. For a simple website product photo, add a white or very light neutral layer behind the item. For a social media graphic, use a brand color that keeps enough contrast around the subject. You can also leave the background transparent when the image must work on several page colors. Transparency is useful for logos, stickers, product overlays and presentation graphics. Keep some natural shadow when it helps the subject look grounded. Remove the shadow when the image needs a flat icon-like appearance.
Export the image with transparency
Save the editable project as an XCF file first. Then open File and choose Export As. Enter a filename ending in .png and select Export. PNG supports the transparent pixels created by the alpha channel. JPEG does not preserve transparent backgrounds and will replace them with a solid color. WebP can support transparency, but PNG remains a simple choice for logos, cutouts and website graphics.
how to remove background in GIMP separates project saving from image exporting. Save As is used for the editable XCF project, while Export As is used for formats such as PNG. The Export As command is available from the File menu, with Shift+Ctrl+E listed as its shortcut.
Fix common background removal problems
If pressing Delete does nothing, confirm that the correct layer is selected and add an alpha channel. If the subject disappears, undo the action and invert the selection before deleting. If the result has hard jagged edges, enable antialiasing and apply a very small feather before removal. If too much of the subject is selected, reduce the Fuzzy Select or Select by Color threshold. If the background reappears after export, make sure the file was exported as PNG instead of JPEG. If brush edits do not affect the mask, click the mask thumbnail before painting. If a checkerboard appears, the background is transparent and the removal has worked.
FAQs
What is the fastest way to remove a white background in GIMP?
Color to Alpha is usually the fastest choice for a plain white background. It keeps partially blended edge pixels, which can produce a smoother result than deleting a hard selection. Check the subject for white areas before applying it. White details inside the subject may also become partly transparent. Use a layer mask when you need more control. Export the finished image as PNG.
Which GIMP tool is best for removing backgrounds?
The best tool depends on the image. Use Fuzzy Select for one connected plain area. Use Select by Color when the same background color appears in several places. Use Paths for products and hard edges. Use Foreground Select for people, pets, hair and fur. Use a layer mask when you want to edit without permanently deleting pixels.
Why does my background turn white instead of transparent?
The image layer probably does not have an alpha channel, or the file was exported in a format without transparency. Add the channel through Layer, Transparency, Add Alpha Channel. Delete or mask the background again after adding it. Look for the checkerboard pattern in GIMP. Export the image as PNG instead of JPEG. Keep the XCF version for future editing.
Can GIMP automatically remove a background?
GIMP provides assisted tools, but the quality still depends on the image and the marks you provide. Foreground Select can estimate the subject after you outline it and paint over representative foreground areas. Fuzzy Select can quickly detect a plain connected background. Select by Color can identify similar colors across the layer. Complex scenes usually need mask cleanup after the first selection. Manual review is still needed around hair, reflections and low-contrast edges.


